

How to Maintain a Security Camera for Long Life
Last Updated: November 3, 2026
Quick Summary
Security camera maintenance means cleaning the lens and housing, inspecting seals, cables and mounts, checking recording gaps and firmware, and repeating these checks on a schedule matched to your camera type and environment. Outdoor and coastal cameras need the shortest intervals, often monthly or every two weeks. Keeping a simple log helps you spot problems early.
Clean the lens with a soft dry microfiber cloth, adding distilled water only for stubborn smudges.
Outdoor cameras in coastal salt air need cleaning every two weeks and a monthly fastener check.
Scrub the timeline for the past 24 hours to find recording gaps.
Check the live view remotely, not just on the local network, to catch angle drift.
Keep a maintenance log so you can see which cameras are aging out.
Table of Contents
Why Regular Security Camera Maintenance Extends Lifespan
A security camera that sits untouched for years often fails long before its rated life. Dust, moisture, loose cables and drifting angles quietly wear it down.
Think of it like a car. Oil changes cost little, while a neglected engine costs a lot. Cameras work the same way.
Many homeowners never think about their cameras until the picture goes black. By then, the damage is often done.
Dust and grime block the lens and reduce image clarity
Moisture can corrode connectors and wiring
Loose cables cause intermittent recording gaps
Shifted angles leave blind spots nobody notices
Watch out: a camera that records fine but has a drifted angle may leave the entry door outside the frame.
Security Camera Maintenance Checklist for Every Camera
A short checklist makes maintenance easy to repeat, but the checklist is only half the job. The other half is knowing how often to run each item. Use the table below to set intervals by camera type and environment, then keep a simple log so you can spot patterns instead of reacting to failures.
Maintenance intervals by camera type and environment
Camera type or environment | Lens and housing clean | Full physical inspection | Firmware and app check |
Indoor, low-traffic room | Every 3 months | Every 6 months | Monthly |
Indoor, high-traffic or retail floor | Monthly | Every 3 months | Monthly |
Outdoor, sheltered eave or porch | Every 2 months | Every 3 months | Monthly |
Outdoor, full sun and rain exposure | Monthly | Every 3 months, plus after storms | Monthly |
Outdoor, dusty or near construction | Every 2 weeks | Monthly | Monthly |
Outdoor, coastal salt air | Every 2 weeks | Monthly, with seal and fastener check | Monthly |
Outdoor, under heavy trees | Monthly | Every 2 months | Monthly |
Battery-powered wireless | Monthly, plus solar panel wipe | Every 3 months | Monthly |
These intervals are starting points. A camera that keeps losing power every summer, or one that fogs after every rain, needs a shorter cycle until the root cause is fixed.
The full checklist
Run every item below at each full inspection, and run the starred items at every cleaning visit.
*Clean the lens and housing with a soft, dry microfiber cloth
*Remove cobwebs, leaves, and debris around the mount
Inspect the housing for cracks, fogging, or bulging seals
Check the power supply and adapter connections
Tighten or re-seat cables and connectors
Confirm the camera angle still covers the target area
Review recent footage for focus and night-vision quality
Check for firmware and app updates
*Verify the live view loads remotely, not just on the local network
*Confirm the recording schedule has no gaps in the last 24 hours
Check free storage and retention days on the recorder or cloud plan
Confirm the camera clock and time zone are correct
Log the date, the items checked, and any problems found
System-level checks most guides skip
Cleaning a lens does nothing if the recorder stopped writing. Consider adding these checks to the same visit:
Storage and retention: confirm the recorder or cloud plan still holds the number of days you expect. A drive that is failing often shows up first as shorter retention, not as a dead camera.
Recording gaps: scrub the timeline for the past 24 hours and look for missing blocks. Gaps usually point to a network drop, a power issue, or a full disk.
Network health: check signal strength on wireless cameras and link speed on wired ones. Weak signal shows up as stuttering video and dropped frames long before the camera goes offline.
Time synchronization: if the camera clock drifts, footage timestamps stop lining up with events. Most systems sync automatically, but a camera that loses time after every power blip needs a battery or network check.
Keep a simple maintenance log, even a notes app entry works. Record the date, the interval used, and anything you fixed. Over a year, the log tells you which cameras are aging out and which ones just need a shorter cleaning cycle.
Cleaning the Lens and Housing Without Damage
Cleaning is the most common camera maintenance task, and it is also the easiest to get wrong.

Start by powering down the camera if you can. Then use a soft microfiber cloth to wipe the lens in gentle circles.
A common mistake is wiping a dusty lens with a dry cloth. Dust grit then scratches the glass.
For the housing, use a mild soap solution on a damp cloth and dry it fully. Make sure no water gets inside the dome or the seal.
Outdoor Security Camera Maintenance and Weather Protection
Outdoor cameras face sun, rain, salt air, insects, and temperature swings, and many outdoor failures trace back to water or heat rather than to the lens. A camera that looks fine from the ground can still be taking on moisture at the cable entry or overheating inside a sealed housing. Inspecting the housing regularly, and after any storm that brings driving rain or high wind, is a sound habit.
Backstreet Surveillance | The Security Experts
What actually fails on an outdoor camera
Seals and gaskets: the rubber ring around the dome or lens bezel hardens with UV exposure and heat. Once it loses its compression, water wicks in and fogs the glass from the inside.
Cable entries: the point where the cable enters the housing or mount is the most common water path. A weatherproof boot or a drip loop keeps water from running down the cable into the connector.
Connectors: exposed barrel connectors corrode, and corrosion raises resistance until the camera browns out or drops offline intermittently.
Condensation: a housing that is sealed too tightly can trap humid air that condenses on the lens when temperatures drop at night. A desiccant pack or a breathable vent plug helps.
Heat: dark housings in full sun can run well above ambient temperature. Over time that shortens the life of the image sensor and the power board.
Mounts and brackets: rust and vibration loosen fasteners, and a loose mount lets the camera drift out of alignment.
How to inspect seals, housings, and cable entries
Power the camera down before touching the housing.
Look for water spots, fogging, or a milky film on the inside of the glass. Any moisture inside means the seal has already failed.
Press gently around the dome or bezel gasket and check for cracks, flattening, or gaps.
Trace the cable from the camera to the first connection. Look for a drip loop, a weatherproof boot, and any sign of green or white corrosion on the pins.
Check the mount and fasteners for rust, looseness, or movement.
Dry the exterior fully before restoring power, and confirm the live view is clear.
Avoid opening a housing in the rain or in high humidity, since trapped damp air can lead to fogging.
Environment-specific protection
Coastal salt air: rinse the housing with fresh water on a damp cloth every two weeks, and check fasteners and connectors for salt corrosion monthly. Stainless fasteners and dielectric grease on connectors make a real difference.
Dusty areas and construction sites: dust packs into vents and around seals. Clean every two weeks, and check that the housing vent is not clogged.
Heavy tree cover: sap, pollen, and cobwebs build up fast. Clean monthly, and trim branches back so they do not scrape the housing in wind.
Full sun: shade the housing where possible, or choose a lighter-colored housing. Check the power adapter for heat damage in summer.
Freezing climates: confirm the camera is rated for the low temperatures you see, and check that ice is not forming on the dome or blocking the IR window.
When to call a qualified technician
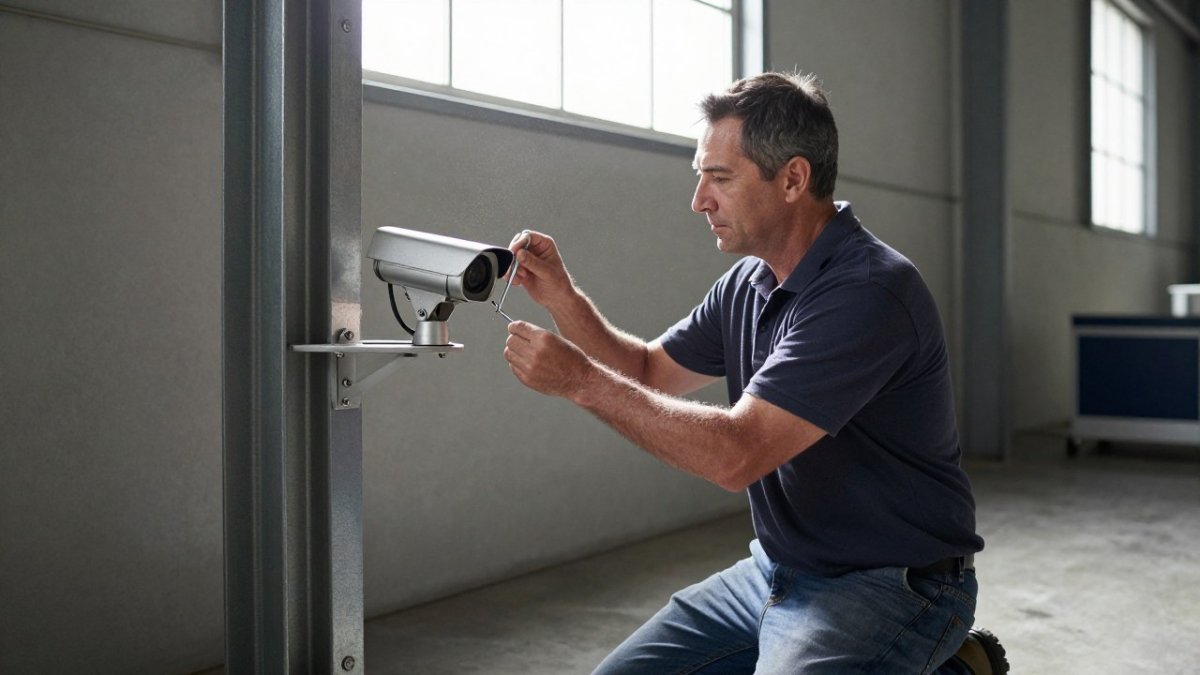
Most cleaning and visual inspection is safe for a homeowner. Electrical work and roof access are common points where a maintenance task can become a safety problem, so a qualified technician is worth considering for those.
Wireless Security Camera Maintenance: Power, Signal, and Firmware
Wireless cameras add three things to check: battery or power, signal strength and software. Each one affects reliability.
For battery models, recharge before the level drops below about 20 percent, and clean the solar panel if one is attached.
Signal problems often look like random offline alerts.
Firmware updates fix bugs and close security gaps. Install them when the manufacturer releases them, but check the release notes first.
Change default passwords and turn on two-factor authentication if the app supports it. Privacy and cybersecurity checks matter as much as cleaning.
How Long a Security Camera Lasts and When to Replace It
Most security cameras last several years, but lifespan depends on quality, climate and care. Indoor units often outlast outdoor ones, since weather takes a toll.
Consider replacing a camera when one or more of these happens:
Image quality stays poor after cleaning and adjustment
Night vision fails or the infrared light no longer turns on
The housing has cracks that let in moisture
The manufacturer no longer releases firmware updates
Repairs cost more than a comparable new model
Lifecycle planning helps. Track purchase dates and warranty periods so you can budget for upgrades instead of reacting to a dead camera.
Scheduling Your Next Camera Inspection With Bay Safe and Lock
Regular checks are easy to put off. If you would rather have a professional inspect your cameras, controls and mounts, Bay Safe and Lock can help. Our team handles residential and commercial security hardware, and we can plan an inspection around your schedule.
Book a visit through our schedule a service appointment page, or ask about upkeep for your existing system. For related hardware care, read our guide on maintaining commercial safe locks.
Frequently Asked Questions
What is the average lifespan of a security camera?
Most security cameras last roughly 3 to 7 years, depending on build quality, environment, and how well they are maintained. Indoor cameras in climate-controlled spaces often last longer than outdoor models exposed to rain, heat, humidity, and temperature swings. Regular cleaning, checking power and cable connections, and keeping firmware current can help a camera reach the upper end of that range. When image quality keeps declining after cleaning and a power check, the camera is likely near the end of its service life and should be evaluated for replacement.
How often should security cameras be cleaned and inspected?
A practical schedule is a quick visual check and lens wipe periodically, and a full inspection every few months. Outdoor cameras in dusty, coastal, or heavily wooded areas may need cleaning more often because salt, pollen, and debris can build up faster. After severe storms, check every camera for damage, loose mounts, and moisture inside the housing. Keep a simple log of each inspection so you can spot patterns, such as a camera that frequently loses its connection.
How do you clean a security camera lens without damaging it?
Power the camera down if possible, then blow off loose dust with a bulb blower or compressed air. Wipe the lens with a soft, lint-free microfiber cloth lightly dampened with distilled water or a lens-safe cleaner. Avoid paper towels, household glass cleaners containing ammonia, and abrasive pads, which can scratch coatings. Dry the lens with a clean section of the cloth and check the image afterward for smudges or haze.
How do you maintain a wireless security camera?
Keep the camera within a strong Wi-Fi signal, ideally checked with the manufacturer's app, and reposition it or add a range extender if the feed drops. Update firmware when the manufacturer releases it, and change default passwords and enable two-factor authentication where offered. Check battery levels on battery-powered models and recharge or replace them before they fail. Clean the lens and confirm the camera still records to its cloud or local storage as expected.
Keeping your cameras clean, connected and up to date protects the investment you already made. Start with the monthly checklist above, and schedule a professional look when something seems off.
Comments