top of page

Table of Contents

  • What Is a Master Key System and How It Works

  • Cost of Master Key System Installation

    • Typical Installation Cost Ranges

    • Itemized Cost Components

    • Cost Variations by System Complexity

    • Geographic and Market Factors

  • Rekeying vs. Replacing Master Key Systems

  • Benefits of Restricted Key Systems

  • Commercial Locksmith Service Pricing and Scope

  • Total Cost of Ownership Over 5-10 Years

  • Security Risks and Vulnerability Assessment

  • Frequently Asked Questions

Last Updated: September 1, 2026

What Is a Master Key System and How It Works

A master key system is a hierarchical access control method where one key (the master key) opens multiple locks, while individual change keys open only their designated locks. This structure creates multiple tiers of access, allowing facility managers to control who can enter specific areas while maintaining a single override key for emergencies or administrative access.

The system works through pin-tumbler lock mechanics. A standard lock contains five or six pins of varying heights (peer-reviewed research). In a master key system, each pin is split into two segments, creating additional shear lines. This design allows both the change key and the master key to align all pins at the correct shear line, but only the master key aligns the additional shear lines created by the split pins.

For example, a property manager might hold the grand master key that opens every unit in an apartment complex, while individual residents hold change keys that open only their own doors. Maintenance staff might carry a master key that opens common areas and utility rooms but not residential units. This tiered hierarchy provides flexibility without compromising security.

The cost of master key system implementation depends on the number of locks being keyed, the complexity of the access hierarchy, and whether you're retrofitting existing locks or installing new hardware. Understanding these factors helps property owners and facility managers budget appropriately for security upgrades.

Bay Safe and Lock provides comprehensive locksmith and security solutions to design and install master key systems tailored to specific access needs. Our team understands the balance between convenience and security that makes these systems valuable for multi-unit properties and commercial facilities.

Cost of Master Key System Installation

The cost of master key system installation varies significantly based on property size, existing hardware condition, and the complexity of your access hierarchy. However, understanding the typical cost breakdown helps property owners and facility managers budget accurately.

Typical Installation Cost Ranges

For a small residential property (5-10 locks), expect installation costs to vary. A mid-sized apartment complex (20-50 units) will also have varying costs, while large commercial facilities (100+ locks with multi-tier hierarchies) can be a significant investment.

These ranges assume professional locksmith labor. Labor typically accounts for a significant portion of the total installation cost, with materials making up the remainder.

Itemized Cost Components

Locksmith labor is a major expense. A typical installation involves:

  • Initial security assessment and system design

  • Lock rekeying or cylinder installation

  • Master key and change key cutting

  • System testing and documentation

Materials include:

  • Rekeying services (if using existing locks)

  • New lock cylinders (if replacement needed)

  • Master key blanks and change keys

  • Hardware modifications, strike plates, or reinforcement as needed

  • Restricted keyway blanks (if applicable)

System design and consultation may be charged separately by some locksmiths for a detailed access hierarchy plan, especially for complex multi-building or multi-tier systems.

Cost Variations by System Complexity

A simple two-tier system (one master key and individual change keys) costs considerably less than a four-tier system with grand master keys, master keys, sub-master keys, and change keys. Each additional tier requires more complex pin configurations and typically adds to material and labor costs.

Lock condition significantly affects pricing. High-quality pin-tumbler cylinders compatible with master key specifications can be rekeyed economically. Budget-grade locks or incompatible hardware require full cylinder replacement, which increases the per-lock cost. Worn or damaged locks may also require strike plate adjustment or door frame reinforcement.

The keyway you choose also affects pricing. Standard keyways are the least expensive option but offer no protection against unauthorized key copying. Restricted keyways, which use proprietary key blanks that only authorized locksmiths can duplicate, add to material costs and typically require a one-time fee to register your system with the manufacturer.

Geographic and Market Factors

Locksmith rates can vary by region. The complexity of your facility layout also matters; a building with numerous interior doors, multiple access zones, and restricted areas requires more detailed planning and installation time than a simple residential setup, potentially adding to labor costs.

Seasonal demand and locksmith availability can also influence pricing. Emergency or rush installation requests typically incur a surcharge. Scheduling installation during off-peak times (weekdays, non-holiday periods) often results in better pricing.
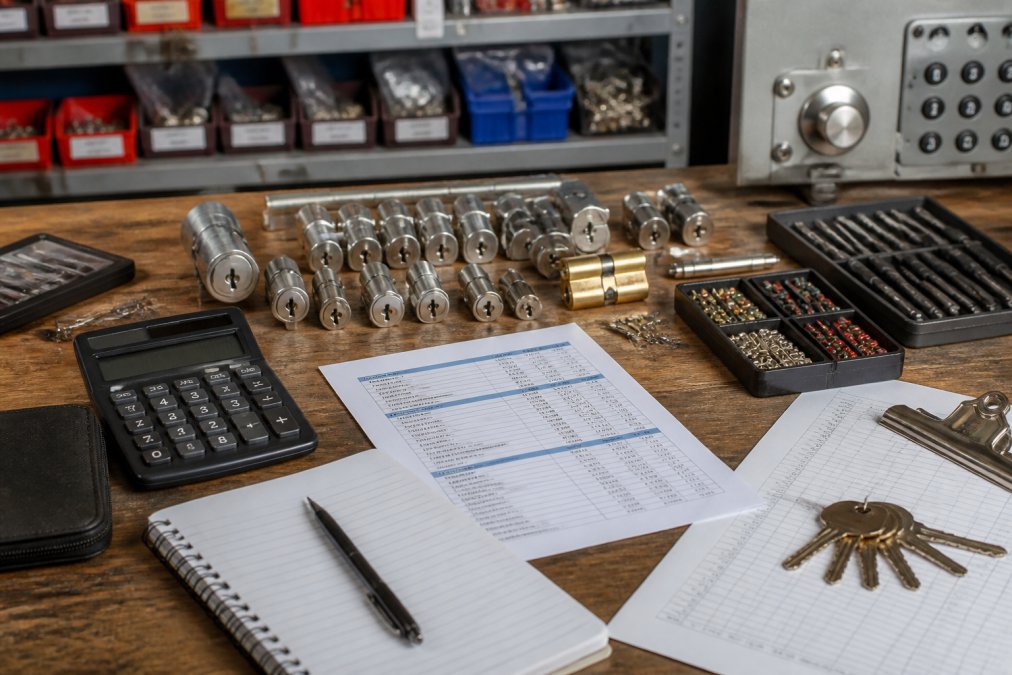
Locksmith workbench with master key system components including cylinders, key blanks, pin stacks, and bitting tools, with a cost estimate sheet visible, professional workshop lighting

Rekeying vs. Replacing Master Key Systems

Rekeying involves removing the existing cylinder from a lock and altering the internal pin configuration to match your new master key system. Replacement means installing entirely new lock hardware. For most property owners, rekeying existing quality locks is the more economical choice when the locks are mechanically sound and compatible with master key specifications.

Rekeying preserves your existing door hardware, frames, and strike plates. If your locks are from reputable manufacturers and the cylinders are in good condition, rekeying them to work with a master key system makes financial sense. The locksmith removes the cylinder, reconfigures the pins to match your key code, and reinstalls it. This process typically takes a short amount of time per lock.

Replacement becomes necessary when locks are damaged, the wrong type for master key configuration, or when you want to upgrade to higher-security options like restricted keyways or anti-pick cylinders. Replacement involves removing the entire lock assembly and installing new hardware, which takes longer and costs more but provides the opportunity to upgrade your security infrastructure.

Close-up of pin-tumbler lock components and key blanks arranged on a workbench, showing internal lock mechanics and master key system bitting patterns, natural workshop lighting

The decision between rekeying and replacement should account for the age and quality of your existing locks. Budget-grade locks may not be worth rekeying; investing in new hardware with modern security features often provides better long-term value. Bay Safe and Lock evaluates your existing hardware during a security assessment to recommend the most cost-effective approach for your situation.

Benefits of Restricted Key Systems

Restricted key systems prevent unauthorized duplication by using proprietary key blanks that standard key-cutting machines cannot reproduce. Only authorized locksmiths with access to the correct blank stock can duplicate these keys, dramatically reducing the risk of unauthorized copies circulating.

This security feature matters most in facilities where access control is critical, such as medical centers, government buildings, financial institutions, and secure storage facilities. If a restricted key is lost or stolen, you have assurance that someone cannot simply walk into a hardware store and create a copy. The restricted keyway creates a documented chain of custody for all keys in the system.

The trade-off is convenience and cost. Restricted key blanks cost more than standard blanks, and key duplication requires contacting an authorized locksmith rather than using a quick-copy service. For properties where security is paramount and the number of keys needed is manageable, this trade-off is worthwhile. For smaller residential properties with lower security requirements, the added expense may not justify the benefits.

Implementing restricted keyways requires planning during initial system design. You cannot easily retrofit a restricted keyway into an existing standard system without replacing all affected cylinders and hardware. This is another reason to work with an experienced locksmith during the planning phase. Bay Safe and Lock can help you determine whether restricted keyways make sense for your specific security needs and budget.

Commercial Locksmith Service Pricing and Scope

Professional locksmith services for master key systems typically include an initial security assessment, system design, installation, and follow-up key management support. The assessment phase involves evaluating your facility layout, identifying all access points, and understanding your security requirements. This consultation helps determine the appropriate tier complexity and hardware specifications.

Commercial locksmiths charge for labor, materials, and expertise. Labor rates vary by market and the technician's experience level, but expect to pay for the time spent on assessment, installation, and testing. Material costs include the cylinders, keys, hardware, and any specialized components your system requires.

Many commercial locksmith firms offer ongoing key management services, tracking key distribution, managing replacements, and conducting periodic security audits. These services add to the initial installation cost but provide valuable documentation and control over your access system. Facilities with high employee turnover or complex access requirements benefit significantly from professional key management support.

When evaluating locksmith quotes, ensure the proposal includes specific details: the number of locks, the tier structure, material specifications, labor hours, and any warranty or follow-up service. A comprehensive quote allows you to compare pricing fairly across providers and understand exactly what you're paying for.

Total Cost of Ownership Over 5-10 Years

The true cost of a master key system extends well beyond initial installation. Over a 5-10 year period, you'll incur costs for key replacement, lock maintenance, rekeying when staff changes require access modifications, and potential hardware repairs or upgrades.

Key replacement represents an ongoing expense. When employees leave, you may need to rekey affected locks to prevent unauthorized access with their old keys. In a large facility with significant turnover, these rekeying costs accumulate quickly. A master key system that allows you to rekey specific zones without affecting the entire facility reduces this expense compared to managing individual locks.

Lock maintenance and repair costs depend on usage and environmental factors. Commercial doors with heavy traffic experience more wear on cylinders and hardware than residential doors (nist.gov). Regular maintenance, lubricating cylinders, checking for wear, and replacing damaged components, extends the life of your system and prevents costly emergency lockouts.

Hardware upgrades may become necessary as security standards evolve or your facility's needs change. A well-designed master key system accommodates expansion; adding new locks to the system costs less than retrofitting an entirely new security infrastructure. This scalability is a significant advantage over ad-hoc security implementations.

When evaluating the cost of master key system options, calculate the total five-year cost including initial installation, estimated annual maintenance and key replacement, and any planned upgrades or expansions. This comprehensive view helps you choose a system that balances upfront investment with long-term operational costs.

Security Risks and Vulnerability Assessment

Master key systems introduce security vulnerabilities that don't exist with individual locks. If a master key is lost or stolen, every lock in the system is potentially compromised. This risk requires careful key management practices and immediate rekeying if a master key goes missing.

Lost change keys present a different concern. If a resident or employee loses their key, an unauthorized person could potentially find it and gain access. Many facilities require immediate rekeying of the affected lock when a key is reported missing, adding to operational costs but preventing security breaches.

The split-pin design that enables master key functionality creates additional shear lines that some security professionals argue make the locks more vulnerable to picking or bumping attacks compared to standard locks (nist.gov). High-security cylinders with anti-pick and anti-bump features mitigate this risk but increase hardware costs.

Key duplication represents a significant vulnerability in systems using standard keyways. Any employee or resident can take their key to a hardware store and have copies made without authorization. This is why restricted keyways exist, but they require ongoing discipline to prevent unauthorized duplication attempts. Even with restricted keyways, social engineering or theft of blank stock can compromise the system.

A professional security audit evaluates your specific vulnerabilities and recommends controls to minimize risk. This might include restricted keyways, limited key distribution, documented key tracking, periodic rekeying schedules, and access control upgrades. Bay Safe and Lock conducts security assessments that identify vulnerabilities in your current system and recommend cost-effective improvements.

The cost of master key system implementation depends on your facility size, access requirements, and security priorities. Initial installation costs vary widely, but the real investment lies in proper planning and professional installation that accounts for your long-term operational needs. A well-designed system reduces administrative overhead through simplified key management while maintaining security through access hierarchy and control.

NEED AN ESTIMATE FOR YOUR PROJECT? Bay Safe and Lock provides comprehensive security assessments and custom master key system design. Our licensed, fully insured team evaluates your facility, recommends the most cost-effective solution, and handles professional installation with ongoing key management support. Contact us for a detailed quote tailored to your property's specific requirements.

Frequently Asked Questions

Q: How much does a master key system cost to install?

A: The cost of master key system installation depends on the number of doors, lock hardware type, labor rates, and whether you're installing a new system or rekeying existing locks. Residential installations typically involve fewer access points than commercial properties, affecting total expense. For an accurate quote tailored to your property's specific needs, contact a licensed locksmith who can assess your access control requirements and provide a detailed estimate.

Q: What factors influence the price of a master key installation?

A: Key cost drivers include the number of doors and locks in your system, the complexity of your key hierarchy (whether you need grand master keys or multiple master levels), lock hardware quality and type, cylinder replacement versus rekeying labor, the use of restricted keyways to prevent unauthorized duplication, and your locksmith's service rates. Larger facilities with complex access control needs typically face higher installation costs than single-unit residential properties.

Q: Is it more expensive to rekey or replace a master key system?

A: Rekeying existing locks is generally less expensive than replacing the entire lock hardware. Rekeying involves changing the internal pin-tumbler configuration so existing locks work with new keys, preserving the hardware. Replacement means installing new lock cylinders and hardware throughout. However, if your current locks are damaged, incompatible with a master key hierarchy, or use non-restricted keyways, replacement may be the better long-term investment despite higher upfront costs.

Q: Do master key systems require ongoing maintenance costs?

A: Yes, master key systems require periodic maintenance and management. Costs include lock servicing, key replacement or duplication, security audits to prevent unauthorized key copying, cylinder cleaning and lubrication, and potential rekeying if keys are lost or staff turnover occurs. Restricted key systems add compliance oversight to ensure only authorized personnel can duplicate keys. Budgeting for annual maintenance prevents security vulnerabilities and extends the life of your hardware.

NEED AN ESTIMATE FOR YOUR PROJECT? CLICK HERE

This article was written using GrandRanker


Table of Contents

  • Why Door Hardware Maintenance Matters Now

  • Lubricating Moving Parts: Best Lubricants for Door Hinges and Locks

    • Choosing the Right Lubricant Type

    • Application Frequency and Technique

  • Cleaning Door Hardware Finishes Without Damage

    • Safe Cleaning Methods by Finish Type

    • Eco-Friendly Cleaning Agents That Work

  • Inspecting Hinges, Alignment, and Fasteners

  • Testing Locks, Latch Mechanisms, and Strike Plates

  • Signs of Failing Door Hardware to Watch For

    • Visual Wear Indicators

    • Functional Warning Signs

  • Commercial Door Lock Maintenance Schedule for 2026

    • Monthly Checks

    • Quarterly and Annual Tasks

    • Climate-Specific Maintenance

  • Maintaining Smart Locks and Modern Security Hardware

  • Frequently Asked Questions

Last Updated: August 31, 2026

Why Door Hardware Maintenance Matters Now

Neglected door hardware fails silently until it stops working entirely. A stuck lock, a hinge that won't hold the door straight, or a latch that doesn't catch properly are security vulnerabilities and operational liabilities. Consistent upkeep prevents 90% of hardware failures before they happen (the CDC).

In 2026, smart locks and modern security systems integrate with your broader access control infrastructure. A failing mechanical component doesn't just affect that one door; it can cascade through your entire security ecosystem. Whether you manage a residential complex, run a retail storefront, or oversee a medical facility, understanding how to maintain door hardware is foundational to operational continuity and security assurance.

This guide covers the practical steps that prevent hardware failure: lubrication techniques, safe cleaning methods, inspection protocols, and the specific warning signs that demand immediate attention.

Lubricating Moving Parts: Best Lubricants for Door Hinges and Locks

Door hinges and locks operate through constant friction. Proper lubrication reduces wear, extends component life, and prevents the squeaking, sticking, and binding that signals mechanical stress.

The wrong lubricant accelerates wear. Heavy oils attract dust and debris, creating a grinding paste inside lock cylinders. Spray lubricants evaporate quickly. Grease-based products gum up in cold weather.

Choosing the Right Lubricant Type

Silicone-based lubricants are the professional standard for door hardware. They provide long-lasting protection without attracting dirt or degrading seals. For hinges, apply light silicone spray to the pin and barrel where friction occurs. For locks, use dry silicone lubricant specifically formulated for lock cylinders to prevent debris accumulation inside the keyway.

PTFE-based lubricants (Teflon compounds) work well for sliding components like door closers and pivot points. Graphite powder is the traditional choice for lock cylinders when you want to avoid any liquid, it's dry, doesn't attract contaminants, and works reliably in extreme temperatures.

Avoid standard machine oil, WD-40, and general-purpose lubricants on door hardware.

Close-up of a gloved hand applying silicone-based lubricant to a door hinge with a small applicator bottle, showing the friction point where the hinge pin sits in the barrel, with warm natural light highlighting the metal hardware

Application Frequency and Technique

Lubricate hinges every 6 months for residential doors, every 3 months for commercial doors. Heavy-traffic areas may benefit from quarterly checks.

Apply lubricant to the hinge pin barrel where friction concentrates. A light spray is sufficient; excess lubricant attracts dust. Open and close the door several times to distribute the lubricant evenly.

For locks, apply lubricant to the keyway and latch bolt mechanism. Insert the key, work it in and out gently, then remove it. This distributes lubricant through internal pins and springs. Don't over-apply; a small amount is all that's needed.

Door closers require special attention at pivot points. Check the manufacturer's specifications for your specific closer model; some require annual lubrication, others are sealed and maintenance-free.

Cleaning Door Hardware Finishes Without Damage

Hardware finishes are protective layers that prevent corrosion. Aggressive cleaning damages these finishes, exposing bare metal to oxidation. The cleaning method depends entirely on the finish type.

Safe Cleaning Methods by Finish Type

Stainless steel finishes tolerate mild soap and water with a soft, non-abrasive cloth. For stubborn marks, a small amount of white vinegar works well. Avoid scouring pads and steel wool.

Brass and bronze finishes require gentler treatment. Use only soft cloth with mild soap and water. For tarnish removal, use a brass-specific cleaner on a small, inconspicuous area first. Never use vinegar on brass.

Chrome finishes are durable but can be damaged by harsh chemicals. Mild soap and water followed by immediate drying is safest. For water spots or light oxidation, use chrome-specific cleaner or rubbing alcohol on a soft cloth.

Painted or powder-coated finishes are the most fragile. Avoid any abrasive action or chemical cleaners. Warm soapy water and a soft cloth are your only safe options. Touch up chips or scratches with matching paint to prevent rust.

Anodized aluminum should be cleaned with mild soap and water only. The anodized layer is thin and easily compromised by abrasive methods.

Eco-Friendly Cleaning Agents That Work

Baking soda mixed with water creates a gentle paste that removes light oxidation and fingerprints without scratching. Castile soap (plant-based, mild) mixed with water is gentler than conventional dish soap and effective for regular cleaning.

For stubborn corrosion, a soft-bristled brush combined with mild soap and water provides gentle scrubbing without scratching.

Inspecting Hinges, Alignment, and Fasteners

A door that doesn't close smoothly, doesn't latch properly, or shows visible gaps indicates alignment or fastener problems. These issues worsen over time, eventually compromising security and function.

Hinge alignment directly affects door operation. When hinges shift even slightly, the door frame no longer aligns with the strike plate. The latch bolt misses the strike hole or hits at an angle, preventing the door from closing fully.

Professional locksmith using a level tool to check vertical door alignment while examining hinge fasteners with a wrench, demonstrating proper inspection technique with natural workshop lighting

Start with visual inspection. Look for gaps between the door and frame at the top, bottom, and sides. A uniform gap of 1/8 inch is normal; larger or uneven gaps indicate alignment problems. Check that the door closes without binding or requiring force.

Inspect each hinge for visible damage or corrosion. Look for rust spots, pitting, or white oxidation. Check the hinge pin, it should be straight and move freely without resistance.

Examine all fasteners that secure hinges, strike plates, and door closers. Look for loose screws, stripped heads, or missing fasteners. Tighten any loose screws with the appropriate driver, but don't over-tighten, which strips the hole. If a screw won't tighten, use a slightly larger diameter screw or a threaded insert.

Check the strike plate alignment. The latch bolt should enter the strike hole smoothly without binding. If it doesn't, loosen the fasteners, adjust the plate slightly, and retighten. Test the latch action after each adjustment.

For commercial doors with door closers, check the pivot points and mounting brackets. These components bear the full weight of the door and see constant stress. Loose or corroded fasteners here create safety hazards.

Testing Locks, Latch Mechanisms, and Strike Plates

A lock that works most of the time is a lock about to fail. Regular testing catches problems before they become security issues or lockouts.

Test the latch bolt by pressing it with your finger, it should retract smoothly and spring back firmly. Any hesitation, grinding, or weak return indicates internal wear or debris.

The deadbolt should turn smoothly in both directions without catching or requiring excessive force.

With the door closed, try the handle or knob. The latch should engage fully without requiring force. If you need to lift the handle or push the door to make the latch catch, the strike plate is misaligned or the latch bolt is worn.

Test key operation by inserting it and turning through the full range of motion. Any resistance, grinding, or sticking suggests debris or internal wear. A key requiring excessive force or refusing to turn fully is a warning sign.

Check the strike plate for wear marks. The latch bolt should leave a clean impression in the strike hole. If the mark is off-center or the bolt is hitting the edge of the plate, adjustment is needed.

For smart locks, test both mechanical and electronic functions. The mechanical key override should work smoothly even if the electronic component is offline. Verify that the lock logs access events correctly.

Signs of Failing Door Hardware to Watch For

Hardware failure rarely happens without warning. The warning signs are there; most property managers simply don't know what to look for.

Visual Wear Indicators

Rust and corrosion are the most obvious indicators of hardware degradation. Surface rust (orange or reddish discoloration) is early-stage corrosion that can be cleaned and prevented. Deep pitting (small holes or craters in the metal) indicates advanced corrosion that compromises structural integrity. Pitted hardware should be replaced rather than repaired.

Tarnish on brass or bronze (dark or black discoloration) is primarily cosmetic but can accelerate if not cleaned regularly. White oxidation on aluminum indicates corrosion of the anodized layer and should be addressed promptly.

Visible gaps between the door and frame indicate misalignment. Gaps at the top or bottom suggest hinge problems; gaps on the sides suggest frame warping or strike plate misalignment.

Loose or missing fasteners are critical to address. A single loose screw can allow a hinge to shift, cascading into alignment problems. Missing fasteners should be replaced immediately with hardware-grade fasteners of the same size and material.

Bent or twisted hinges, strike plates, or door closers indicate impact damage or structural stress. These components should be replaced, not straightened.

Functional Warning Signs

A squeaking hinge is your hardware asking for lubrication. This is the easiest warning sign to address and should never be ignored.

A door that sticks or binds during opening and closing is misaligned or has internal mechanical wear. If lubrication doesn't resolve the issue, the hardware likely needs adjustment or replacement.

A latch that doesn't catch without force indicates strike plate misalignment or latch bolt wear. Test the latch in several positions to determine if the problem is consistent.

A key that's hard to turn, grinds when inserted, or occasionally gets stuck indicates internal debris or wear. This is a security risk.

A door closer that closes too slowly, too fast, or inconsistently indicates hydraulic fluid loss or internal spring failure. These components should be replaced.

A smart lock that fails to respond to the app, requires multiple unlock attempts, or shows inconsistent access logs indicates electronic or mechanical failure. Test the mechanical override immediately.

Commercial Door Lock Maintenance Schedule for 2026

Preventative maintenance schedules prevent emergency failures. Frequency depends on door usage, environmental conditions, and hardware type.

Monthly Checks

Visually inspect all doors for obvious problems: loose fasteners, visible corrosion, gaps between door and frame, or hardware that looks out of place. Test all locks by turning keys smoothly and verifying that latches engage without force. Listen for squeaking or grinding sounds when opening and closing doors. Check for signs of attempted tampering or forced entry.

Quarterly and Annual Tasks

Every three months, lubricate all hinges and locks. Every six months, tighten all fasteners using the appropriate driver with firm but not excessive pressure. Annually, perform a comprehensive inspection: check hinge alignment with a level, inspect all fasteners for corrosion, test strike plate alignment, and examine door closers for leaks or sluggish operation.

For commercial properties, schedule professional maintenance annually. A licensed locksmith can identify wear patterns and catch problems that visual inspection alone might miss.

Climate-Specific Maintenance

High-humidity environments accelerate corrosion. Monthly lubrication and quarterly fastener checks are minimum standards. Consider upgrading to stainless steel or marine-grade hardware if corrosion is persistent.

Cold climates require attention to door closers and locks. Cold temperatures thicken hydraulic fluid in closers and can make locks stiff. Monthly testing ensures reliable operation in extreme cold.

Dry climates create different challenges. Low humidity means less corrosion risk, but dust and sand can accumulate in lock cylinders and hinge mechanisms. Monthly cleaning and lubrication prevent debris buildup.

High-traffic areas need quarterly or monthly lubrication and fastener checks. Constant use accelerates wear, so more frequent maintenance prevents failures.

Maintaining Smart Locks and Modern Security Hardware

Smart locks add electronic and software layers to mechanical hardware. Maintenance is more complex but follows the same fundamental principles: keep moving parts lubricated, fasteners tight, and monitor for warning signs.

The mechanical components of a smart lock, hinges, latches, strike plates, require the same maintenance as traditional hardware. Lubricate the latch mechanism and any pivot points with silicone-based lubricant. Tighten fasteners that secure the lock body to the door. Check alignment and strike plate function regularly.

Keep the battery fresh by testing the lock monthly with the app or keypad. If the lock shows a low-battery warning, replace batteries immediately. A dead battery locks you out and disables the mechanical override if the electronic mechanism seizes.

Test the mechanical override (usually a physical key) monthly to ensure it works smoothly. This is your backup access method if the electronic component fails.

Monitor access logs through the smart lock's app or platform. Unexpected access attempts, failed authentication events, or gaps in logging indicate potential tampering or electronic malfunction. If you see suspicious activity, change your access codes and have the lock inspected professionally.

For integrated smart lock systems, verify that the lock communicates with your system regularly. Locks that drop offline or show inconsistent status are experiencing connectivity or hardware problems.

Apply software updates promptly. These updates often include security patches and firmware improvements. Check the manufacturer's app monthly for available updates.

Keep the lock body and surrounding door hardware clean. Wipe the lock body monthly with a soft, dry cloth.

Door hardware maintenance doesn't require specialized skills; it requires consistency. Monthly visual inspections, quarterly lubrication, and annual deep checks prevent 90% of hardware failures (osha.gov). When problems do occur, you'll catch them early enough to plan repairs rather than face emergency lockouts or security breaches. If you need professional inspection, lubrication, or repair services tailored to your property's specific hardware and environment, our licensed team can evaluate your doors and create a maintenance plan that fits your operation. Contact us for a consultation on how to protect your property's security infrastructure through proactive hardware care.

=== FAQ ANSWERS (audit these too, same rules) ===

[1] Q: How often should you lubricate commercial door locks? A: Commercial door locks typically need lubrication every 3 to 6 months, depending on usage frequency and environmental conditions (the American Dental Association). High-traffic areas may require quarterly maintenance. Use silicone-based lubricants or light machine oil, avoiding sticky products that attract dust. Test the lock's operation after lubrication to ensure smooth function. More frequent lubrication may be needed in humid or salty air environments where corrosion accelerates wear.

[2] Q: What are the signs that door hardware needs professional repair? A: Watch for grinding or squeaking sounds when operating locks, visible rust or pitting on metal surfaces, keys that stick or turn with excessive force, latches that don't catch fully, or hinges that sag causing misalignment. If doors won't close smoothly or locks engage inconsistently, professional inspection is warranted. Corrosion on strike plates or escutcheons, spring tension loss in closers, and security concerns warrant immediate expert attention to maintain structural integrity and security.

[3] Q: What tools are required for basic door hardware maintenance? A: Essential tools include a silicone-based lubricant, non-abrasive cloths for cleaning, a wrench or socket set for fasteners, a level for alignment checks, and a screwdriver set. For deeper maintenance, add a door closer adjustment tool, hex key set, and a flashlight for inspecting pivot points and keyways. Keep a small brush for removing debris from latch mechanisms. For commercial properties, consider a maintenance log to track tasks and identify patterns in hardware wear.

[4] Q: Can improper cleaning damage high-end door finishes? A: Yes, harsh abrasives, acidic cleaners, or steel wool can strip clear coat finishes and cause tarnish or pitting on premium hardware. Use pH-neutral, non-abrasive solutions and soft cloths instead. Avoid vinegar or lemon-based products on polished or brushed finishes. Test any new cleaner on an inconspicuous area first. Eco-friendly options like mild soap and water work well for most finishes. Regular gentle cleaning prevents buildup that might tempt you to use stronger chemicals, preserving finish integrity and hardware longevity.

Frequently Asked Questions

How often should you lubricate commercial door locks?

Commercial door locks typically need lubrication every 3 to 6 months, depending on usage frequency and environmental conditions. High-traffic areas may require quarterly maintenance. Use silicone-based lubricants or light machine oil, avoiding sticky products that attract dust. Test the lock's operation after lubrication to ensure smooth function. More frequent lubrication may be needed in humid or salty air environments where corrosion accelerates wear.

What are the signs that door hardware needs professional repair?

Watch for grinding or squeaking sounds when operating locks, visible rust or pitting on metal surfaces, keys that stick or turn with excessive force, latches that don't catch fully, or hinges that sag causing misalignment. If doors won't close smoothly or locks engage inconsistently, professional inspection is warranted. Corrosion on strike plates or escutcheons, spring tension loss in closers, and security concerns warrant immediate expert attention to maintain structural integrity and security.

What tools are required for basic door hardware maintenance?

Essential tools include a silicone-based lubricant, non-abrasive cloths for cleaning, a wrench or socket set for fasteners, a level for alignment checks, and a screwdriver set. For deeper maintenance, add a door closer adjustment tool, hex key set, and a flashlight for inspecting pivot points and keyways. Keep a small brush for removing debris from latch mechanisms. For commercial properties, consider a maintenance log to track tasks and identify patterns in hardware wear.

Can improper cleaning damage high-end door finishes?

Yes, harsh abrasives, acidic cleaners, or steel wool can strip clear coat finishes and cause tarnish or pitting on premium hardware. Use pH-neutral, non-abrasive solutions and soft cloths instead. Avoid vinegar or lemon-based products on polished or brushed finishes. Test any new cleaner on an inconspicuous area first. Eco-friendly options like mild soap and water work well for most finishes. Regular gentle cleaning prevents buildup that might tempt you to use stronger chemicals, preserving finish integrity and hardware longevity.

NEED AN ESTIMATE FOR YOUR PROJECT? CLICK HERE

This article was written using GrandRanker
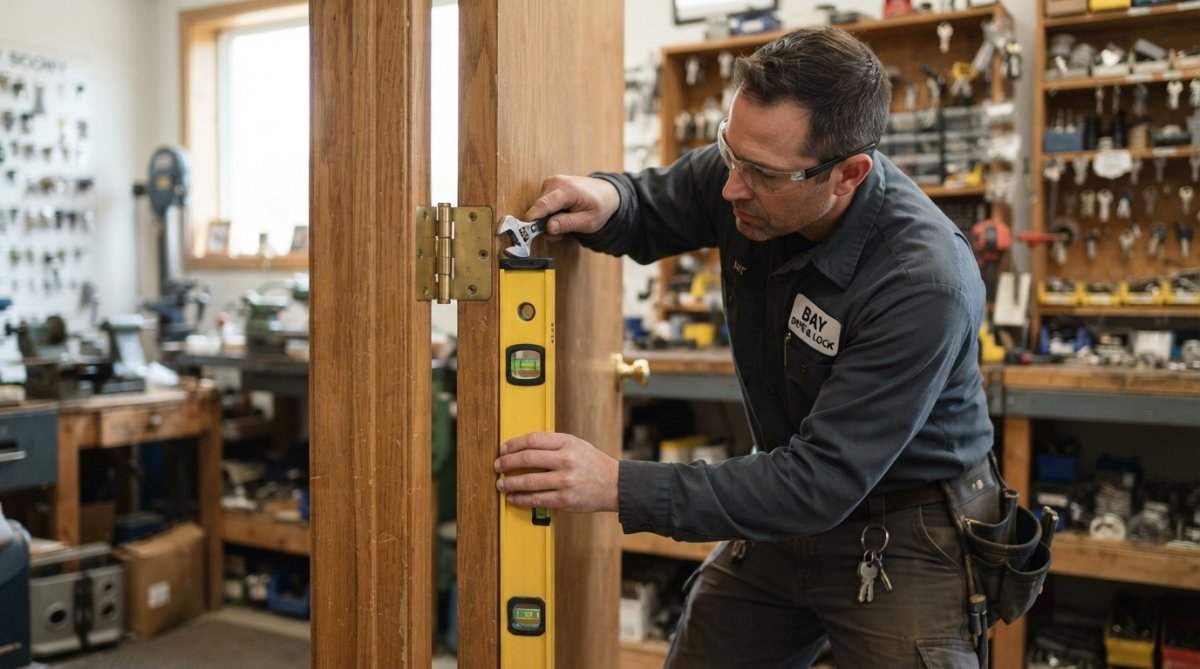


Table of Contents

  • How a Lock Cylinder Works: The Basics

  • Rekey vs. Replace Locks: When Each Makes Sense

  • Tools and Materials You'll Need to Rekey a Lock

  • Step-by-Step: How to Rekey Your Residential Locks

    • Step 1: Remove the Lock Cylinder from the Door

    • Step 2: Remove the Retaining Ring and Plug

    • Step 3: Replace the Key Pins and Springs

    • Step 4: Reassemble and Test Your Lock

  • How Long Does It Take to Rekey a Lock?

  • How to Fix a Jammed Door Lock

  • When to Call a Professional Locksmith

  • Conclusion

Last Updated: August 30, 2026

How a Lock Cylinder Works: The Basics

A lock cylinder is the rotating component inside your lock that physically turns when the correct key is inserted. Inside sit small metal pieces called key pins and driver pins, stacked in vertical columns. When you insert the correct key, its unique cuts align these pins at a critical point called the shear line, allowing the cylinder to rotate freely and retract the bolt. The wrong key leaves pins misaligned, keeping the lock in place.

Springs push the key pins downward, while driver pins extend into a stationary housing called the bible of the lock. When the correct key lifts the key pins to exactly the right height, the driver pins sit flush with the shear line, allowing the entire cylinder to turn.

Rekeying works by replacing the key pins with a different set, changing which key will align the pins correctly. The lock mechanism itself stays intact, only the pins swap out. This makes rekeying far more economical than replacing the entire lock.

Rekey vs. Replace Locks: When Each Makes Sense

Deciding whether to rekey or replace your locks depends on practical factors. Rekeying changes the internal pins so old keys no longer work and new keys operate the lock. Replacing means installing an entirely new lock mechanism.

You've lost your keys and need to prevent old key holders from accessing your home. You've recently moved into a home and want to ensure previous owners can't enter. You want to change who has access without upgrading your security hardware. You're consolidating keys or setting up a master key system where one key opens everything while individual keys open specific locks.

Replace your locks when:

Your lock is physically damaged, broken, or no longer functions smoothly. You're upgrading to a higher-security lock type with anti-pick features. You want to change lock types entirely, such as moving to a smart lock. The lock is very old and internal components are worn or corroded. You lack confidence in the lock's security history.

Cost comparison:

Rekeying a single lock typically costs less than replacing it. DIY rekeying requires purchasing a rekey kit and tools, a one-time investment. Professional rekeying service varies by location and complexity. For most homeowners, rekeying is the practical first choice when locks function correctly but access control needs to change.

Tools and Materials You'll Need to Rekey a Lock

Before you start, gather the right tools to prevent frustration and lost components.

Essential tools:

A rekey kit specific to your lock type is non-negotiable. It contains the new key pins and usually includes a follower tool, which prevents springs from launching when you remove the plug. You'll also need a screwdriver (usually Phillips head) to remove the retaining ring, tweezers or small needle-nose pliers for tiny pins, snap ring pliers if your lock uses a snap ring, and a key blank cut to your new key specification.

Optional but helpful tools:

A small container or tray to organize pins and springs, a workbench or flat surface with good lighting, a small flashlight or headlamp, and a lock diagram or reference guide specific to your lock brand.

Materials to have on hand:

The new key pins from your rekey kit, replacement springs if any existing springs are damaged, and a small amount of lock lubricant or dry PTFE-based lubricant. Avoid WD-40 or oil-based products, which attract dust and gum up the mechanism (the CDC).

Step-by-Step: How to Rekey Your Residential Locks

Rekeying a residential lock is methodical and requires patience. Set aside 30-45 minutes per lock.

Step 1: Remove the Lock Cylinder from the Door

Insert your current key and turn it to the nine o'clock position (a quarter turn). This aligns the plug so the retaining ring or set screw is accessible.

Locate the retaining ring or screw on the edge of the lock face or inside the door. Remove it carefully with your screwdriver or snap ring pliers.

Gently pull the cylinder straight out of the lock housing. If it resists, adjust the key position slightly and try again.

Set the cylinder on your workbench with the key still inserted.

Professional locksmith's hands using screwdriver and tweezers to carefully remove retaining ring from residential lock cylinder on wooden workbench, with rekey kit components organized nearby

Step 2: Remove the Retaining Ring and Plug

With the key still in the cylinder, locate the small metal ring or clip on the back, this is the retaining ring that holds the plug in place.

Using snap ring pliers or a small screwdriver, carefully remove this back retaining ring.

Remove the key. The plug should slide out of the bible. Have your follower tool ready or position your hand to catch springs that might pop out.

As you withdraw the plug, springs and key pins may fall. This is normal. Gently wiggle the plug, allowing pins and springs to drop into your container.

Inspect each pin and spring as it comes out and note the order. Take a photograph or sketch if your lock diagram doesn't show the arrangement clearly.

Step 3: Replace the Key Pins and Springs

Clean the plug and bible thoroughly with a dry cloth to remove dust or debris.

Insert the new springs into the plug, one per pin column, from the back. Make sure each spring sits flush in its chamber.

Insert the new key pins in the correct order, matching your rekey kit instructions. Use tweezers to position them precisely on top of each spring.

Insert your new key into the plug. It should fit smoothly and turn without resistance. If it binds, a pin is likely misaligned, remove the key and check positions.

Step 4: Reassemble and Test Your Lock

Insert the plug back into the bible, guiding it straight in until fully seated.

Install the back retaining ring, ensuring it's properly seated in its groove.

Reinstall the front retaining ring on the outside of the lock.

Turn your new key to the nine o'clock position and slide the cylinder back into the lock housing in the door. Reinstall the retaining screw or ring.

Turn your new key through a full rotation. It should turn smoothly from locked to unlocked and back. Test it several times.

Try your old key. It should no longer work. Test the lock from both sides of the door to ensure smooth operation.

How Long Does It Take to Rekey a Lock?

For a first-time DIYer, expect 45 minutes to an hour per lock. As you gain familiarity, subsequent locks typically take 20-30 minutes each.

Professional locksmiths often complete a single lock rekey in 15-20 minutes, though service call fees may apply (aloa.org). For multiple locks, the per-lock time decreases because setup happens once.

Factors that extend rekeying time include unfamiliar lock brands, locks with additional security features, and stiff or unserviced locks. If you're rekeying several locks across your home, plan for a full afternoon or weekend project.

How to Fix a Jammed Door Lock

A jammed lock is often fixable without replacement. The most common cause is debris, corrosion, or dried lubricant inside the cylinder (nist.gov).

Quick fixes:

Apply a dry PTFE-based lock lubricant into the keyway. Insert your key and work it back and forth gently. This often dislodges debris and frees up the mechanism. Repeat several times if necessary.

If lubricant alone doesn't work, insert the key, apply slight rotational pressure (don't force it), and gently tap the key with a small hammer. The vibration can help shift stuck components.

For severe corrosion, soak a cloth in white vinegar and wipe the exterior of the lock and keyway. Let it sit for 30 minutes, then repeat the lubricant process.

When to replace:

If the key breaks inside the lock, if the cylinder is visibly cracked, or if the lock remains jammed after multiple lubrication attempts, replacement is more practical. A damaged lock cylinder cannot be safely rekeyed.

Homeowner applying dry PTFE lubricant spray into residential deadbolt keyway on wooden door, demonstrating proper maintenance angle and technique

When to Call a Professional Locksmith

While rekeying residential locks is achievable for many homeowners, certain situations warrant professional help.

Call a professional if:

Your lock is a high-security model with anti-pick pins or other specialized features. You're unsure which lock type you have or the lock lacks clear identifying marks. You need a master key system installed. You've attempted rekeying and the lock no longer functions correctly. You need to rekey locks quickly across a large property. Your lock is damaged, jammed, or physically compromised.

At Bay Safe and Lock, our team handles rekeying projects of all sizes, from single residential locks to master key systems for apartment complexes and commercial properties. With over a decade of hands-on experience, we understand the nuances of different lock types and can identify when a lock is rekeyable versus when replacement is the better option. We're licensed and fully insured, so you have peace of mind knowing your security is in professional hands.

Conclusion

Rekeying residential locks is a practical, cost-effective solution when you need to change access control without upgrading your hardware. The process requires patience, the right tools, and attention to detail, but it's well within reach for homeowners willing to invest the time.

Understanding how your lock works, the pin tumbler mechanism, the shear line, and how key pins align to allow rotation, demystifies the entire rekeying process. Whether you tackle rekeying yourself or hire a professional depends on your comfort level, the number of locks involved, and whether you need a master key system. For straightforward single-lock rekeying, DIY is viable. For complex setups, multiple properties, or high-security locks, professional service from Bay Safe and Lock ensures the job is done correctly and your home remains secure.

Frequently Asked Questions

Is it cheaper to rekey or replace residential locks?

Rekeying is typically more affordable than replacing locks. When you rekey, you change only the internal key pins and springs, the lock body stays in place. Replacement requires removing the entire lock and installing new hardware. For a single deadbolt, rekeying costs significantly less. For multiple locks or if your existing locks are damaged or outdated, replacement may be the better long-term investment. Contact Bay Safe and Lock for a quote on your specific situation.

Can any residential lock be rekeyed?

Most pin tumbler deadbolts and knob locks can be rekeyed, but not all locks are compatible. Older locks, specialty locks, or those with security pins may have limitations. Before attempting to rekey, verify your lock's compatibility, check the manufacturer's documentation or consult a locksmith. Some locks use restricted key blanks or master key systems that require professional service. When in doubt, Bay Safe and Lock can assess your locks and recommend the best approach.

Do I need special tools to rekey a residential lock?

Yes, a rekey kit is essential. A quality kit includes a plug follower, retaining ring removal tool, tweezers, and a pick or tension tool. Basic hand tools like a flathead screwdriver are also necessary. Attempting to rekey without the right tools risks damaging the lock cylinder or losing small springs and pins. Invest in a dedicated rekey kit designed for residential locks to ensure you have everything needed for a successful job.

How long does it take to rekey a residential lock?

A single lock typically takes 15 to 30 minutes if you have experience and the right tools. Your first lock may take longer as you become familiar with the process. If rekeying multiple locks, plan for 20 to 30 minutes per lock. Professional locksmiths work faster due to experience but charge for their labor. For apartment complexes or multiple-unit properties, a locksmith's efficiency and master key expertise often justify the cost.

NEED AN ESTIMATE FOR YOUR PROJECT? CLICK HERE

This article was written using GrandRanker


Rosemary M.

Dan from Bay Safe - great worker, highly professional and super intelligent!!!

Adam G.

Had my safe opened and repaired in no time flat. Very satisfied with their professionalism.

Anthony R.

I can tell you've been doing this for a long time.
Bay Safe & Lock QR code

        Hello, from Bay Safe & Lock

My wife, Hayley and daughters, Jane and Eden. Our faith and values inspire a strong desire to serve others with excellence. A daily prayer in our home is that the Lord would bless us with grace, success and prosperity in direct proportion to our integrity. 

Colossians 3:23

bottom of page